💡 I included the link to the example repository at the conclusion of this tutorial.
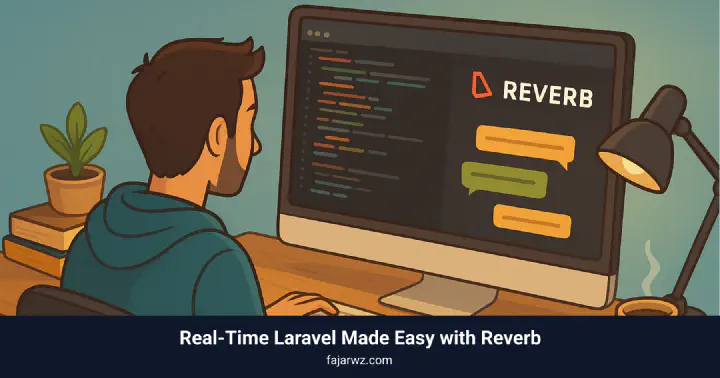
If you’ve ever tried to add real-time features to your Laravel app, like chat, notifications, or live dashboards, you know it can feel kinda intimidating. Traditionally, you had to wrestle with Pusher or spin up custom WebSocket servers.
But with Laravel Reverb, that pain is gone. Reverb is Laravel’s first-party WebSocket server, built right into the framework. It lets your app send and receive events instantly, without leaving the Laravel ecosystem. It feels just like writing normal Laravel code.
In this tutorial, we’ll build a simple chat-like feature together:
- Install and configure Reverb
- Create a broadcast event
- Listen for it on the frontend
- Send messages and receive it in real-time
- Demonstrate how to send an event from client to server using the
send_eventand Reverb’sMessageReceivedevent
Let’s jump in! 🏊♂️
Step 1: Install Laravel Reverb
First things first, let’s install Reverb by using the install:broadcasting Artisan command and choose Reverb.
php artisan install:broadcasting
What this does:
- Installs Laravel Echo and its dependencies on the frontend.
- Publishes a default broadcasting config (
config/broadcasting.php). - Sets up everything you need to start working with events, channels, and Reverb out of the box.
That’s it! You can now run a WebSocket server with:
php artisan reverb:start
This spins up your Laravel-powered WebSocket server, no third-party service needed.
Step 2: Set Up Routes to Send Messages
Here’s a simple route setup that lets us send messages from the browser:
<?php

use App\Events\SendMessage;
use Illuminate\Support\Facades\Route;

Route::get('/', function () {
    return view('welcome');
});

Route::get('/send', function () {
    SendMessage::dispatch(request()->msg);
    return 'Message sent!';
});
- Visiting
/send?msg=Hellowill dispatch aSendMessageevent. - That event will be broadcast over our WebSocket server so all connected clients can hear it.
Step 3: Create the Broadcast Event
Using Public Channels
Now let’s make the event that actually gets broadcast:
<?php

namespace App\Events;

use Illuminate\Broadcasting\Channel;
use Illuminate\Broadcasting\InteractsWithSockets;
use Illuminate\Contracts\Broadcasting\ShouldBroadcast;
use Illuminate\Foundation\Events\Dispatchable;
use Illuminate\Queue\SerializesModels;

class SendMessage implements ShouldBroadcast
{
    use Dispatchable, InteractsWithSockets, SerializesModels;

    public string $message;

    public function __construct(string $message)
    {
        $this->message = $message;
    }

    public function broadcastOn(): array
    {
        return [
            new Channel('message'),
        ];
    }
}
Key things here:
- It implements ShouldBroadcast, so Laravel knows to send it over Reverb.
- It broadcasts on the message channel.
- It carries a $message property that clients will receive.
This is fine for demos or public updates, but in real apps like chat, you don’t want just anyone listening in. That’s where private channels come in. 🔒
Read also:
Using Private Channels
To switch to a private channel, change the broadcastOn method to use PrivateChannel instead of Channel:
use Illuminate\Broadcasting\PrivateChannel;

public function broadcastOn(): array
{
    return [
        new PrivateChannel('chat.' . auth()->id()),
    ];
}
This means:
- Only authenticated users can subscribe.
- The channel name is
chat.{userId}, so each user gets their own private channel. - Laravel will call an authorization callback to decide if the current user can listen.
Defining Broadcast Authorization
You need to define the rules for who can join a private channel. Open routes/channels.php and add:
use Illuminate\Support\Facades\Broadcast;

Broadcast::channel('chat.{userId}', function ($user, $userId) {
    return (int) $user->id === (int) $userId;
});
This says:
- A user may only listen to the chat.{id} channel if their own ID matches the {id} in the channel name.
- So chat.5 is only accessible to user with id=5.
Step 4: Sending Messages (HTTP) and Receiving via WebSocket
Let’s start with the most common and secure flow:
- The frontend sends a message via HTTP (/send?msg=Hello).
- Laravel broadcasts it over Reverb.
- Other clients receive it instantly via WebSocket.
Here`s how we send the message from the backend route we created earlier:
Route::get('/send', function () {
    SendMessage::dispatch(request()->msg);
    return 'Message sent!';
});
And here’s how the frontend listens for it:
// Listen for broadcast from server
window.Echo.channel("message")
  .listen("SendMessage", (e) => {
    console.log("Received: ", e.message);
  });

// Example for Private Channels
window.Echo.private(`chat.${userId}`)
  .listen("SendMessage", (e) => {
    console.log("Private message received:", e.message);
  });
This way, your chats are securely sent through Laravel’s HTTP layer (where you can apply authentication, authorization, and validation). Then Laravel broadcasts them to connected clients over Reverb. This is the approach you’ll want to stick with for most use cases like chat messages, notifications, or anything that needs to be trusted. 🔒
Step 5: Sending Events Directly from the Frontend
Using send_event
First, here’s how to fire off a raw event right from your browser, where you can utilize bidirectional nature of Websocket. Here we will demonstrate how to send a typing event:
var userId = Math.random();

// Send a raw event (no HTTP needed)
function sendTyping() {
  window.Echo.connector.pusher.send_event(
    "UserIsTyping", // event name
    { userId }, // payload
    "message" // channel
  );
  console.log("Sending...");
}

// Example usage
document.getElementById("messageForm").addEventListener("submit", (e) => {
  e.preventDefault();
  console.log("Submitted!");
  sendTyping();
});

// Listen for UserIsTyping event
window.Echo.channel("message")
  .listen("UserIsTyping", (e) => {
    console.log(`Typing: User ${e.userId} is typing...`);
  });
Here’s a simple Blade template so users can send typing event from the browser:
<!-- welcome.blade.php -->
<form id="messageForm">
    <button type="submit" class="bg-blue-500 rounded px-4 py-2" id="sendBtn">Send "User is typing..."</button>
</form>
Now, for those raw events to actually get turned into proper Laravel broadcasts, we need a listener on the backend. That’s where our ReceiveEvent comes in:
<?php

namespace App\Listeners;

use App\Events\SendMessage;
use Laravel\Reverb\Events\MessageReceived;

class ReceiveEvent
{
    public function handle(MessageReceived $event): void // Notice this Event injected here. This is important so we can listen to the Reverb's event
    {
        $messageEvent = json_decode($event->message);
        if ($messageEvent->event === 'UserIsTyping') {
            UserIsTyping::dispatch($messageEvent->data->userId);
        }
    }
}
Now create the event:
class UserIsTyping implements ShouldBroadcast
{
    use Dispatchable, InteractsWithSockets, SerializesModels;

    public string $userId;

    public function __construct(string $userId)
    {
        $this->userId = $userId;
    }

    public function broadcastOn(): array
    {
        return [
            new Channel('message'),
        ];
    }
}
What’s happening here:
Laravel\Reverb\Events\MessageReceivedfires whenever Reverb gets a raw WebSocket message.- We decode it, check if it’s a
UserIsTyping, and then re-dispatch it as a proper Laravel broadcast. - This lets raw frontend messages reach other clients. But remember, no auth layer is protecting this by default.
⚠️ That’s why the secure approach for me is still: ➡️ Send via HTTP -> Laravel validates -> Broadcast via WebSocket.
And raw WebSocket sends are best for non-sensitive signals like:
- “User is typing…” indicators.
- Presence pings like “online/offline.”
But if you should use it for sensitive data, make sure you also create the security system.
Read also:
Using Whisper
Besides using this approach, you can also utilize the Echo’s whisper method to send client events:
Echo.private(`chat.${roomId}`)
    .whisper('typing', {
        name: this.user.name
    });
To listen for it, you may use the listenForWhisper method:
Echo.private(`chat.${roomId}`)
    .listenForWhisper('typing', (e) => {
        console.log(e.name);
    });
Step 6: Testing
Let’s test this real quick by running the local development server with composer run dev for Laravel 12 or php artisan serve.
To start the Reverb server, run:
php artisan reverb:start
We use queue on the Event so let’s also run:
php artisan queue:work
Here is how the user-1 window looks like:
 Here is how the user-2 window looks like:
 Now here the user-1 send a message using the
 /send?msg= route, demonstrating the HTTP -> Websocket flow:
 The user-2 receive it:
 The user-1 now sends the typing event by clicking on the “Send “User is typng…”” button, demonstrating the Websocket -> Websocket flow:
 Now the user-2 receive it:

Conclusion
And that’s it! You just built an app that demonstrates real-time communication with Laravel Reverb. No third-party service, no messy setup, its easy.
With Reverb, you can power:
- Chat apps 💬
- Live notifications 🔔
- Realtime dashboards 📊
What I like is it feels native to Laravel.
So, what will you build first with Reverb?
💻 The repository for this example can be found at fajarwz/blog-laravel-reverb.
💡 Thanks for reading all the way to the end. If you found this helpful, please like or star the Github repo so I know it’s really helpful. Otherwise, let me know what I can improve in the comment or email.


